


I thought I would start a new thread, since the other was getting long.
I had done a lot of recent upgrades and maintenance on the car.. all of it for the first time, so I figured I would share my experience/learning curve.
First off, I was getting a lot of vibration after installing JHM Rotors and EBC Redstuff pads, all around. It was vibrating slightly at 80mph more in my seat than steering wheel, then also badly upon braking on the steering wheel. I assumed 2 different issues here. And it was.
The front rotors became warped from the EBC hard break/bed-in that I did. I think I may have overdone it. I had had them turned/trued while doing my KW install, and this has appeared to alleviate the front end vibration issue. I re-used the EBC Reds. Going to be very light on them for now.
The rears seemed OK, so I inspected the hubs and found there to be a LOT of rust buildup. This would make sense.. the new rotors probably were not sitting completely flush against the hub. Here are before/after pics. Problem gone. My solution should be apparent.. Recommend for anyone to do this during rotor replacement.
Before. Hard to tell, but ther was def a few mm of buildup of rust! Enough to throw off the balane.
During
After
On to the KWs. This was pretty straightforward really. I had access to a lift, spring tools, etc so it made life easy. What made life difficult was trying to tackle ALL the control arms at the same time without reading up on how to do it first. more on that later.
The Box: pretty legit packaging!
Cover off
1st layer off
2nd layer off
I laid everything out, and began to tear out the DRC. I began by plugging the lines with the supplied KW block off nuts. The instructions are misleading.. it shows the small ones going on the front, and large in the back, but its in fact opposite.
Fronts, big ones go here and hold in place through the bracket.
Rears here with the smaller plugs. Not a whole lot of juice came out, but then again, most of mine is probably scattered along the highways of CA.
Pulling off the front uppers /strut isnt too hard. This has all been documented before, with the 3 bolts up top having to come out under the hood for the shock mount. With the lift, this can be done in a few minutes. No issues here. One trick is to bang on the top of the upper ball joints in a downward motion, instead of pulling/prying them out.. saved a lot of time.
NO. do not do..
OOPS - theres the source of that clicking sound.. I had to order a new drive shaft, which set me back a day.
Mess
The rear you have to loosen the subframe which is slightly more trick but this was no issue either.
I pulled off the old spring perch, old bump-stops, and replaced the shock mounts (round circular cupcake rubber thing) with new ones, and tightened everything down. I used a spring clamp which is pretty much necessary. the center shaft can spit when tightening, and you need this tight.. so make sure you can get something to grip it in process when bolting it back together
Waiting for old spring perch.
I then set the ride height and confirmed the rebound/damping before reinstall. did one stiffer on compression from the recommended settings, as Pat did. Ride height initially was set by some weird math I did, based on measuring from where the spring meets the adjustment perch, to the centerline of the strut bushing on the bottom (where it connects to lower control arms). This is called "measurement A" in KWs instructions. I went with 305mm for front, and 195mm for rear. Skipping a head a bit, but this gave an awful rake. I raised the front about 15mm and lowered the rear maybe 20mm. Today, its nearly perfect, and I may lower the front just slightly to make it an even losely-fitting 1 finger gap all around. I will re-take measurements after I do the last adjustment, so that those installing newly can set it up exactly right from the beginning.
Rear installed, tightening up
Passenger rear
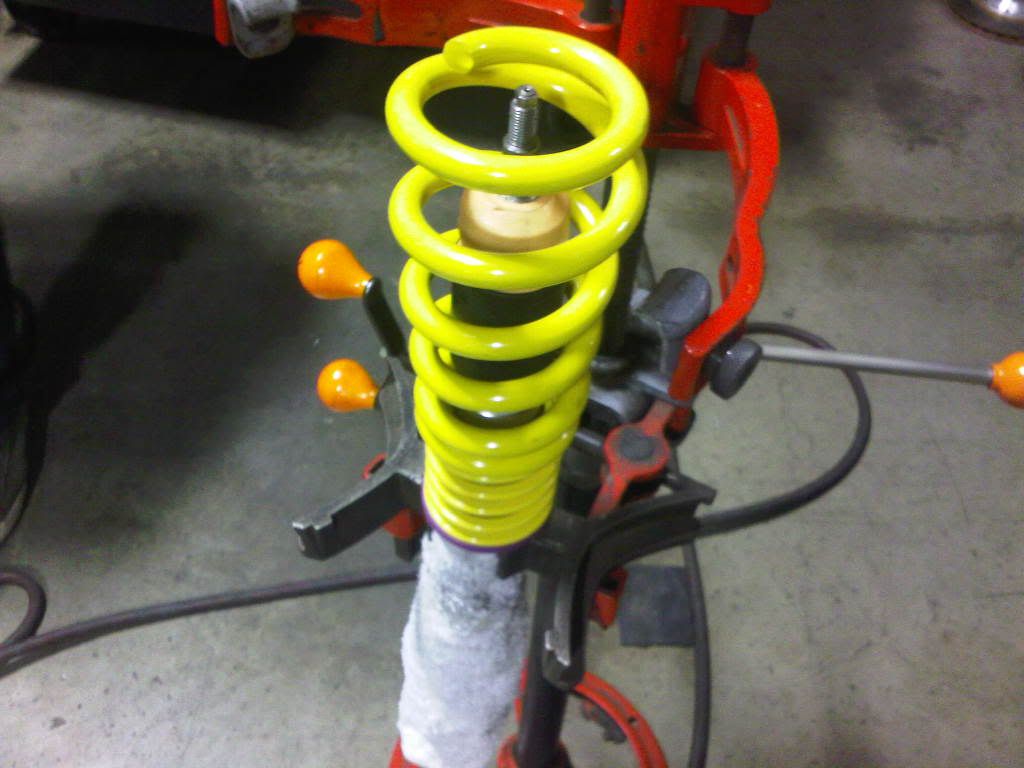
With JHM and EBCs.
During this process.. I decided to change all control arms. I ordered the 034 Motoring density line with the hardware kit..
In box
The price was good, and I had terrible knocking over bumps, so this was the right time to do it. Uppers were quite easy. The lowers.. were more problematic. Mostly because I was too afraid to remove both left and right engine cradle screws at the same time, which for me was necessary to get the rediculously long bolts out. I also didnt have a ball joiint puller, so I had to call and wait for help on those. Basically it could have gone much smoother had I did my homework and was prepared with the right tools. I am not one for following directions, what can I say. The bolts for the lower fronts on the inside is a pain. It sometimes seems the long bolt will not back out all the way because the washer is too big for the opening its backing out into, but you just have to carefully slide it over and around the opening then back it all the way out, and its simple.
I DID run into a big problem. The lower fronts would NOT go in after an hour of frustration. We then realized that the balljoints were TOO BIG and would not fit into the cups in the spindle assembly. the 034 pieces were not correct. Not only that, but the entire bolt kit was 90% useless. All wrong sizes. I dont know what happened yet, and i will post pics when i receive them of the difference, but I clearly got the wrong parts. I had to order the Meyle lower fronts which cost me half of the cost of the entire 034 kit, and another day.
Finally, I got it all back together late Friday night, after 5 hours of screwing around. I went around and pre-loaded the suspension 1 at a timewith a very long spiral jack (common in any shop) and tightened everything up. I told my girlfriend it wouldnt take long at all once I got the new control arms.. boy did i screw up. This is how I kept her warm and occupied, LOL
heatlamps!
Initial ride height after my final adjustments, pre-settle.
All I can say is, after all the frustration, WOW what a difference. Going from destroyed air-filled DRC and shot bushings to all new control arms and KWs transformed the car. I haven't pushed it hard yet because I want to go easy on the rotors for a few hundred miles. But just to not have any more clunkity-clack all the time is worth it. The car feels great and is noticeably different from stock. Yes, harsher over the more acute bumps, but is really a comfortable ride in general.
As mentioned it seems the front is just a TAD too high, not quite 1 finger. Hard to tell, but I still want to get it perfect.
Ride height after a couple days
I am actually excited to go out and drive the car now to experience the new feel, and quietness. I wish I had more photos and pointers. A friend has more that I am waiting for.
All I can say is, its not HARD to do any of this if you know a couple tricks, do your HW, and have the right tools. KWs alone without control arms would be very easy to tackle for the average self-wrencher.


 Reply With Quote


